- SpringBoot集成MyBatis
- SpringBoot事务管理
- SpringBoot中SpringMVC注解
- SpringBoot实现RESTful
- SpringBoot集成Redis
- SpringBoot集成Dubbo
- SpringBoot热部署插件
- SpringBoot集成Thymeleaf
- SpringBoot Thymeleaf表达式
- SpringBoot Thymeleaf常见属性
- Thymeleaf字面量、字符串拼接及运算符
- Thymaleaf表达式基本对象与功能对象
SpringBoot集成Dubbo
阿里巴巴提供了dubbo集成springBoot开源项目,可以到GitHub上https://github.com/alibaba/dubbo-spring-boot-starter查看入门教程。
基本集成步骤
1.开发Dubbo服务接口
按照Dubbo官方开发建议,创建一个接口项目,该项目只定义接口和model类。
项目名称:019-springboot-dubbo-exterface
① 创建普通Maven项目,dubbo服务接口工程


② 创建UserService接口
public interface UserService {
    String say(String name);
}
2.开发Dubbo服务提供者
项目名称:021-springboot-dubbo-provider
① 创建SpringBoot WEB项目
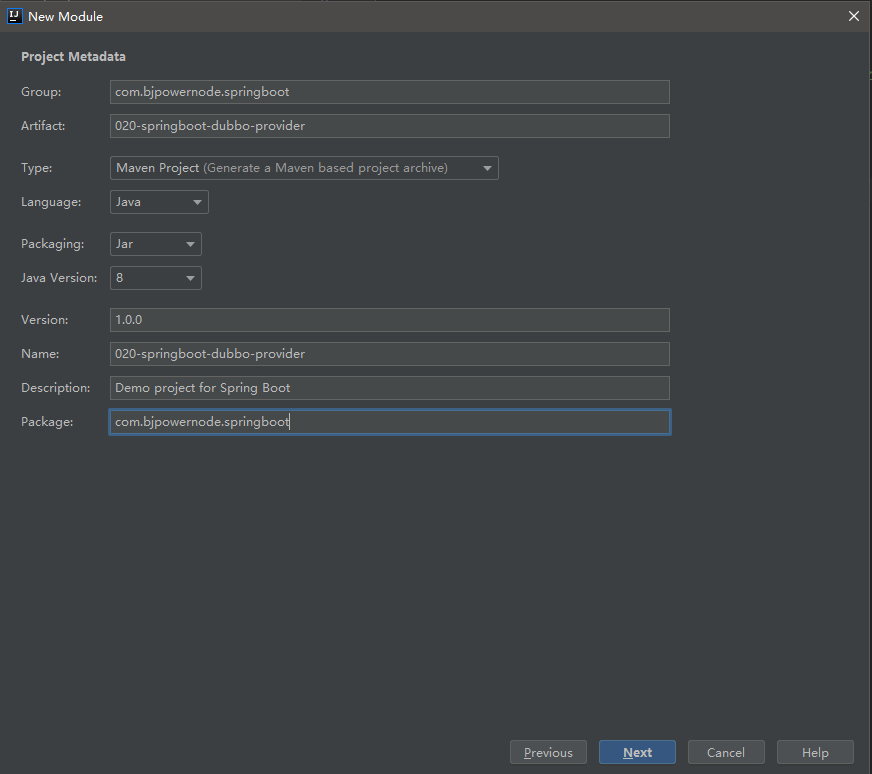
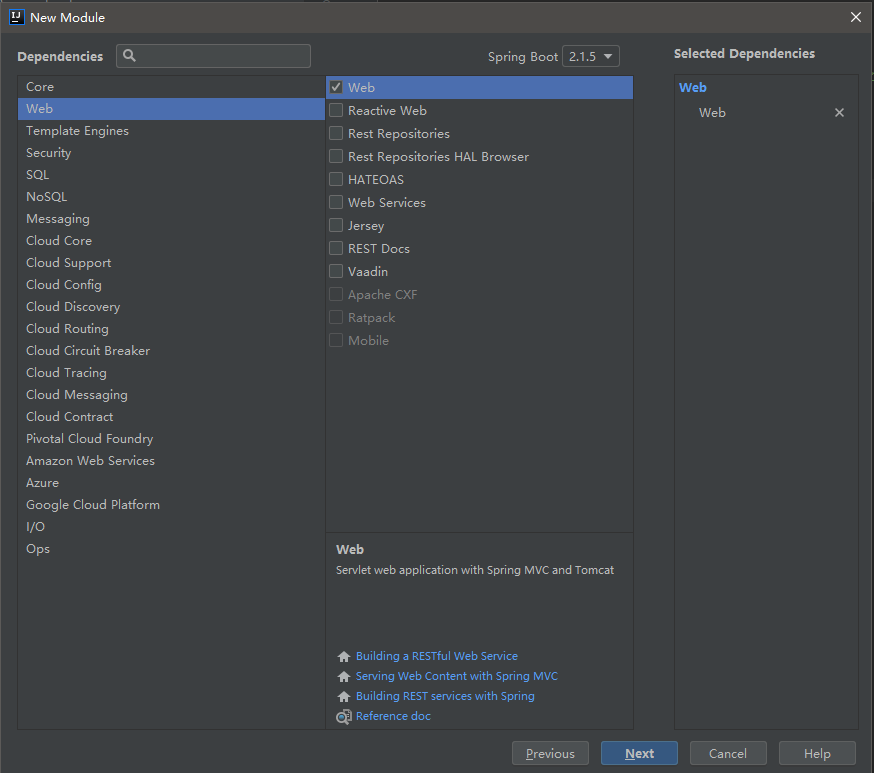
② 加入springboot与dubbo集成的起步依赖
<!--Spring Boot集成Dubbo的起步依赖-->
<dependency>
   <groupId>com.alibaba.spring.boot</groupId>
   <artifactId>dubbo-spring-boot-starter</artifactId>
   <version>2.0.0</version>
</dependency>
③ 由于使用zookeeper作为注册中心,需加入zookeeper的客户端依赖
<!--ZooKeeper注册中心依赖-->
<dependency>
   <groupId>com.101tec</groupId>
   <artifactId>zkclient</artifactId>
   <version>0.10</version>
</dependency>
④ 加入019-springboot-dubbo-exterface接口依赖
<!--Dubbo接口工程依赖-->
<dependency>
    <groupId>com.sxbdqn.springboot</groupId>
    <artifactId>019-springboot-dubbo-exterface</artifactId>
    <version>1.0.0</version>
</dependency>
⑤ 在Springboot的核心配置文件application.properties中配置dubbo的信息
#配置内嵌Tomcat端口号
server.port=9090

#配置项目上下文根
server.servlet.context-path=/020-springboot-dubbo-provider

#配置Dubbo服务提供者配置
#服务提供者应用名称必须写,且不能重复
spring.application.name=020-springboot-dubbo-provider
#表示是服务提供者,可以省略
spring.dubbo.server=true
#注册中心地址
spring.dubbo.registry=zookeeper://192.168.92.134:2181
注意:Dubbo的注解都是自定义的注解,由我们添加的Dubbo依赖中的类进行处理编写dubbo配置是没有提示的
⑥ 编写Dubbo的接口实现类
import com.alibaba.dubbo.config.annotation.Service;
import org.springframework.stereotype.Component;

//@Service是由阿里提供的注解,不是spring的注册
//@Service相当于
//如果提供者指定version,那么消费者也得指定version
@Service(interfaceClass = UserService.class,version = "1.0.0",timeout = 15000)
@Component  //将接口实现类交给spring容器进行管理
public class UserServiceImpl implements UserService {

    @Override
    public String say(String name) {
        return "Hello SpringBoot!";
    }
}
⑦ 在SpringBoot入口程序类上加开启Dubbo配置支持注解
@SpringBootApplication
@EnableDubboConfiguration//开启Dubbo配置支持
public class Application {
   public static void main(String[] args) {
      SpringApplication.run(Application.class, args);
   }
}
⑧ 启动Zookeeper服务
o 启动Linux服务器上的Zookeeper

o 启动服务提供者项目主程序
3.开发Dubbo服务消费者
项目名称:021-springboot-dubbo-consumer
① 创建SpringBoot WEB项目
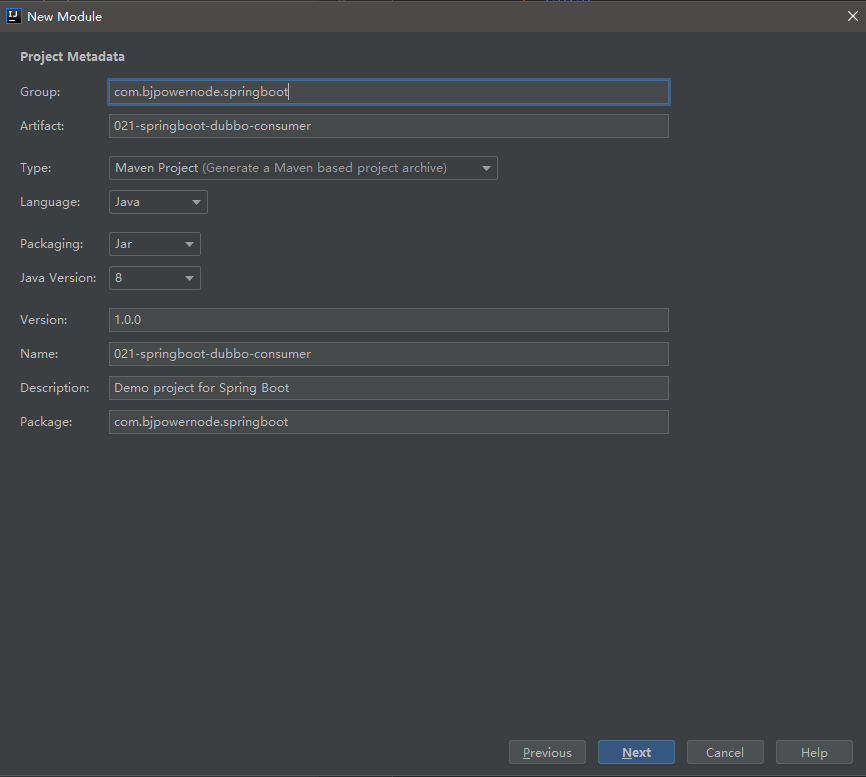
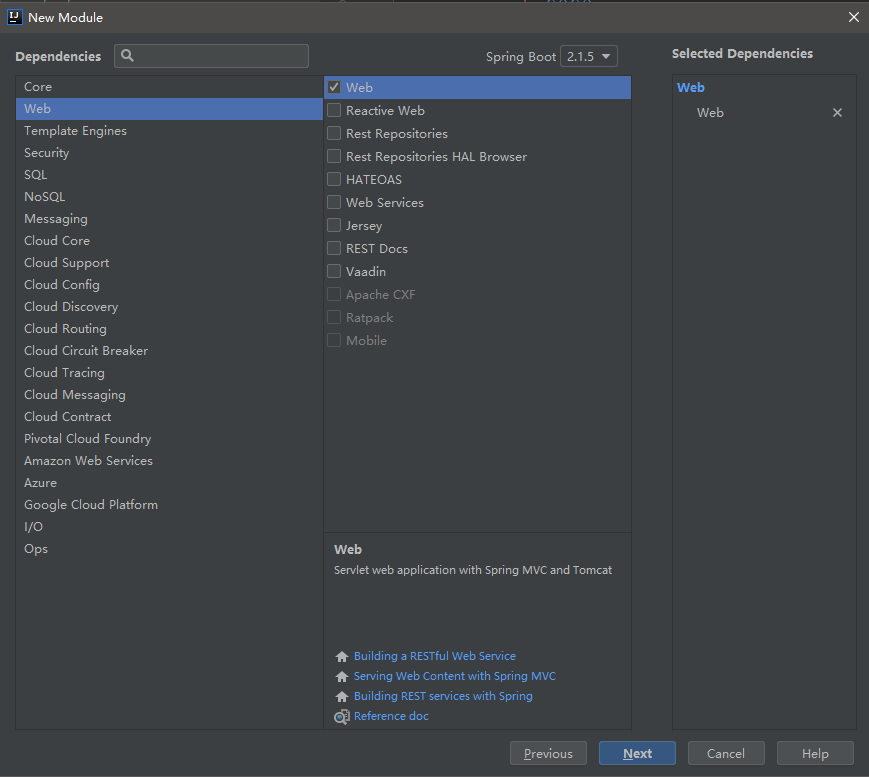
② 加入springboot与dubbo集成的起步依赖
<!--Spring Boot集成Dubbo的起步依赖-->
<dependency>
   <groupId>com.alibaba.spring.boot</groupId>
   <artifactId>dubbo-spring-boot-starter</artifactId>
   <version>2.0.0</version>
</dependency>
③ 由于使用zookeeper作为注册中心,需加入zookeeper的客户端依赖
<!--ZooKeeper注册中心依赖-->
<dependency>
    <groupId>com.101tec</groupId>
    <artifactId>zkclient</artifactId>
    <version>0.10</version>
</dependency>
④ 加入019-springboot-dubbo-exterface接口依赖
<!--Dubbo接口工程依赖-->
<dependency>
    <groupId>com.sxbdqn.springboot</groupId>
    <artifactId>019-springboot-dubbo-exterface</artifactId>
    <version>1.0.0</version>
</dependency>
⑤ 在Springboot的核心配置文件application.properties中配置dubbo的信息
#配置内嵌Tomcat端口号
server.port=8080

#配置项目上下文根
server.servlet.context-path=/021-springboot-dubbo-consumer

#配置dubbo服务提供者配置
spring.application.name=021-springboot-dubbo-consumer
#配置注册中心地址
spring.dubbo.registry=zookeeper://192.168.92.134:2181
⑥ 编写一个Controller类,调用远程的Dubbo服务
import com.alibaba.dubbo.config.annotation.Reference;
import com.sxbdqn.springboot.service.UserService;
import org.springframework.web.bind.annotation.RequestMapping;
import org.springframework.web.bind.annotation.RestController;

import javax.servlet.http.HttpServletRequest;

@RestController
public class UserController {

    //@Reference注册是由阿里所提供
    //@Reference注解 相当于
    //如果服务提供者
    @Reference(version = "1.0.0")
    private UserService userService;

    @RequestMapping(value = "/springBoot/hello")
    public Object hello(HttpServletRequest request) {

        String sayHello = userService.say("SpringBoot");

        return sayHello;
    }
}
⑦ 在SpringBoot入口程序类上加开启Dubbo配置支持注解
@SpringBootApplication
@EnableDubboConfiguration //开启Dubbo配置支持
public class Application {

    public static void main(String[] args) {
        SpringApplication.run(Application.class, args);
    }
}
⑧ 测试
o 启动服务消费者项目主程序
o 浏览器访问测试

SpringBoot + Dubbo + Mybatis+Redis集成
该实例目的是为了让同学们快速学会使用SpringBoot集成搭建SpringMVC、Spring、MyBatis及Redis
1.创建Maven Java工程,Dubbo接口工程
项目名称:022-springboot-ssm-dubbo-exterface
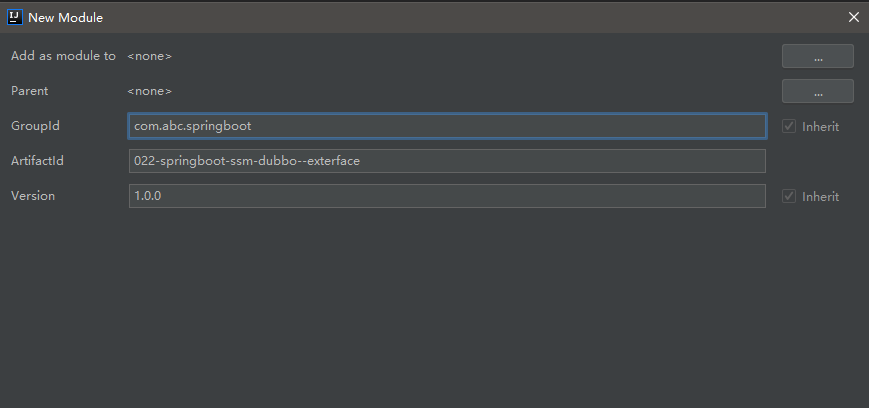
2.创建StudentService业务接口类
package com.abc.springboot.service;

import com.abc.springboot.model.Student;
import java.util.List;

/**
 * ClassName:StudentService
 * Package:com.abc.springboot.service
 * Description:

 */
public interface StudentService {

    /**
     * 查询所有学生
     * @return
     */
    List queryAllStudent();

    /**
     * 获取学生总人数
     * @return
     */
    Long queryAllStudentCount();
}
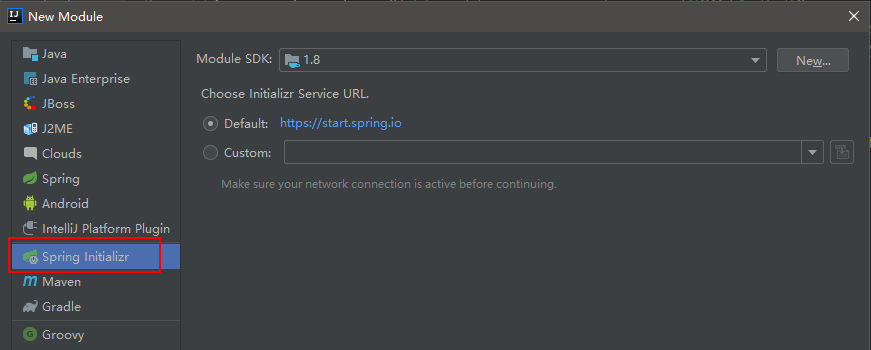
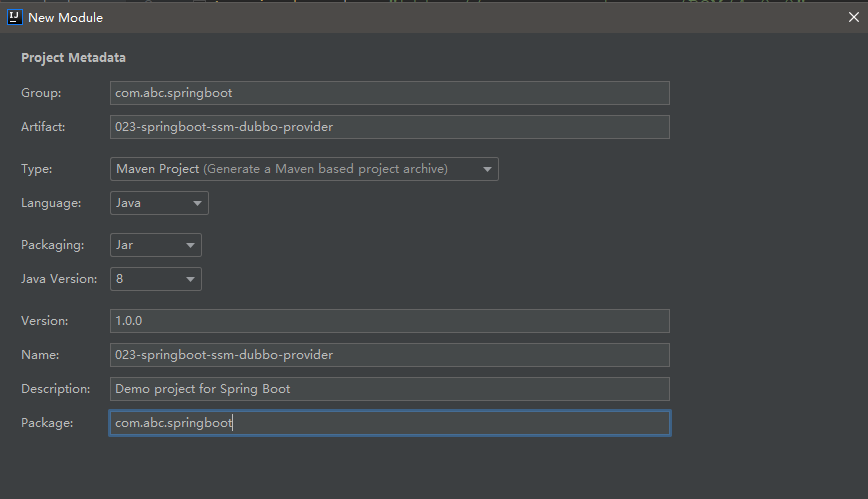
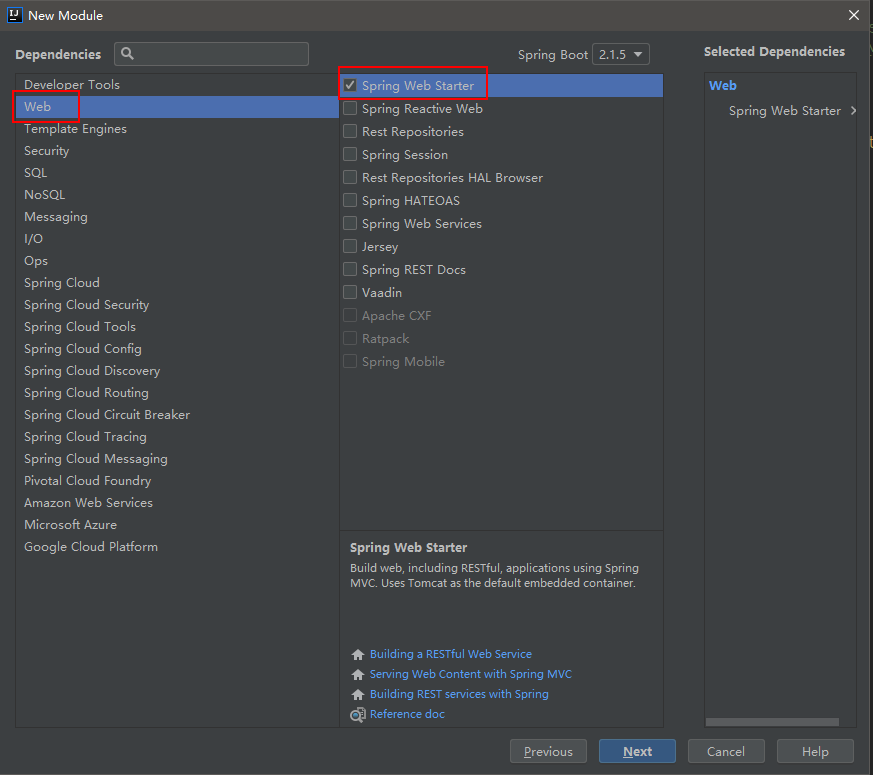
3.创建Dubbo服务提供者
项目名称:023-springboot-ssm-dubbo-provider
4.给Dubbo服务提供者添加依赖
<!--SpringBoot集成Dubbo起步依赖-->
<dependency>
    <groupId>com.alibaba.spring.boot</groupId>
    <artifactId>dubbo-spring-boot-starter</artifactId>
    <version>2.0.0</version>
</dependency>

<!--zookeeper注册中心-->
<dependency>
    <groupId>com.101tec</groupId>
    <artifactId>zkclient</artifactId>
    <version>0.10</version>
</dependency>

<!--MyBatis集成SpringBoot框架起步依赖-->
<dependency>
    <groupId>org.mybatis.spring.boot</groupId>
    <artifactId>mybatis-spring-boot-starter</artifactId>
    <version>2.0.0</version>
</dependency>

<!--连接MySQL数据库驱动-->
<dependency>
    <groupId>mysql</groupId>
    <artifactId>mysql-connector-java</artifactId>
</dependency>

<!--SpringBoot集成Redis起步依赖-->
<dependency>
    <groupId>org.springframework.boot</groupId>
    <artifactId>spring-boot-starter-data-redis</artifactId>
</dependency>

<!—dubbo接口工程 -->
<dependency>
	<groupId>com.abc.springboot</groupId>
<artifactId>022-springboot-ssm-dubbo-exterface</artifactId>
<version>1.0.0</version>
</dependency>
5.手动指定资源配置文件路径在pom文件中的build标签中添加
<!--手动指定资源配置文件路径-->
<!--目的:将数据持久层映射文件编译到classpath中-->
<resources>
    <resource>
        <directory>src/main/java</directory>
        <includes>
            <include>**/*.xml</include>
        </includes>
    </resource>
</resources>
6.配置MyBatis逆向工程
① 添加插件
<!--mybatis代码自动生成插件-->
<plugin>
    <groupId>org.mybatis.generator</groupId>
    <artifactId>mybatis-generator-maven-plugin</artifactId>
    <version>1.3.7</version>
    <configuration>
        <!--配置文件的位置-->
        <configurationFile>GeneratorMapper.xml</configurationFile>
        <verbose>true</verbose>
        <overwrite>true</overwrite>
    </configuration>
</plugin>
② 将配置文件存放到项目根据目录

③ GeneratorMapper.xml内容如下
<?xml version="1.0" encoding="UTF-8"?>
<!DOCTYPE generatorConfiguration
        PUBLIC "-//mybatis.org//DTD MyBatis Generator Configuration 1.0//EN"
        "http://mybatis.org/dtd/mybatis-generator-config_1_0.dtd">

<generatorConfiguration>

    <!-- 指定连接数据库的JDBC驱动包所在位置,指定到你本机的完整路径 -->
    <classPathEntry location="E:\mysql-connector-java-5.1.38.jar"/>

    <!-- 配置table表信息内容体,targetRuntime指定采用MyBatis3的版本 -->
    <context id="tables" targetRuntime="MyBatis3">

        <!-- 抑制生成注释,由于生成的注释都是英文的,可以不让它生成 -->
        <commentGenerator>
            <property name="suppressAllComments" value="true" />
        </commentGenerator>

        <!-- 配置数据库连接信息 -->
        <jdbcConnection driverClass="com.mysql.jdbc.Driver"
                        connectionURL="jdbc:mysql://192.168.92.134:3306/springboot"
                        userId="root"
                        password="123456">
        </jdbcConnection>

        <!-- 生成model类,targetPackage指定model类的包名, targetProject指定生成的model放在eclipse的哪个工程下面-->
        <javaModelGenerator targetPackage="com.abc.springboot.model"
                            targetProject="E:\course\031-SpringBoot\000-springboot-projects\022-springboot-ssm-dubbo-exterface\src\main\java">
            <property name="enableSubPackages" value="false" />
            <property name="trimStrings" value="false" />
        </javaModelGenerator>

        <!-- 生成MyBatis的Mapper.xml文件,targetPackage指定mapper.xml文件的包名, targetProject指定生成的mapper.xml放在eclipse的哪个工程下面 -->
        <sqlMapGenerator targetPackage="com.abc.springboot.mapper" targetProject="src/main/java">
            <property name="enableSubPackages" value="false" />
        </sqlMapGenerator>

        <!-- 生成MyBatis的Mapper接口类文件,targetPackage指定Mapper接口类的包名, targetProject指定生成的Mapper接口放在eclipse的哪个工程下面 -->
        <javaClientGenerator type="XMLMAPPER" targetPackage="com.abc.springboot.mapper" targetProject="src/main/java">
            <property name="enableSubPackages" value="false" />
        </javaClientGenerator>

        <!-- 数据库表名及对应的Java模型类名 -->
        <table tableName="t_student" domainObjectName="Student"
               enableCountByExample="false"
               enableUpdateByExample="false"
               enableDeleteByExample="false"
               enableSelectByExample="false"
               selectByExampleQueryId="false"/>
    </context>

</generatorConfiguration>
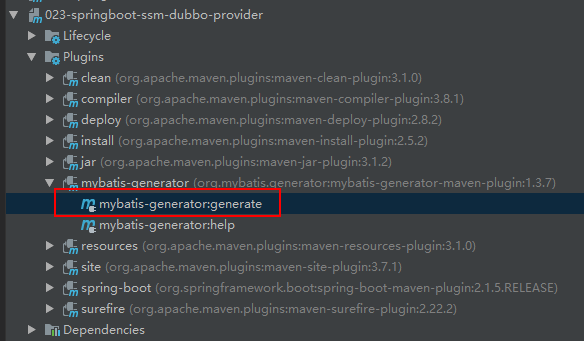
④ 点击插件生成

⑤ 实体beann必须实现序列化

7.配置023-springboot-ssm-dubbo-provider核心配置文件
application.properties
#配置内嵌Tomcat端口号
server.port=8081


#配置项目上下文根
server.servlet.context-path=023-springboot-ssm-dubbo-provider

#配置连接MySQL数据库信息
spring.datasource.url=jdbc:mysql://192.168.92.134:3306/springboot?useUnicode=true&characterEncoding=UTF-8&useJDBCCompliantTimezoneShift=true&useLegacyDatetimeCode=false&serverTimezone=UTC
spring.datasource.driver-class-name=com.mysql.cj.jdbc.Driver
spring.datasource.username=root
spring.datasource.password=123456

#配置dubbo服务提供者
spring.application.name=023-springboot-ssm-dubbo-provider
#表示是服务提供者
spring.dubbo.server=true
#注册中心地址
spring.dubbo.registry=zookeeper://192.168.92.134:2181

#配置redis连接信息
spring.redis.host=192.168.92.134
spring.redis.port=6379
spring.redis.password=123456
8.StudentServiceImpl业务接口实现类
package com.abc.springboot.service;

import com.abc.springboot.mapper.StudentMapper;
import com.abc.springboot.model.Student;
import com.alibaba.dubbo.config.annotation.Service;
import org.springframework.beans.factory.annotation.Autowired;
import org.springframework.data.redis.core.RedisTemplate;
import org.springframework.data.redis.serializer.StringRedisSerializer;
import org.springframework.stereotype.Component;

import java.util.List;
import java.util.concurrent.TimeUnit;

/**
 * ClassName:StudentServiceImpl
 * Package:com.abc.springboot.service
 * Description:<br/>
 */
@Service(interfaceName = "com.abc.springboot.service.StudentService",version = "1.0.0",timeout = 15000)
@Component
public class StudentServiceImpl implements StudentService {

    @Autowired
    private StudentMapper studentMapper;

    @Autowired
    private RedisTemplate<Object,Object> redisTemplate;

    @Override
    public List<Student> queryAllStudent() {
        return studentMapper.selectAllStudent();
    }

    @Override
    public Long queryAllStudentCount() {
        //设置redisTemplate的key序列化方式
        redisTemplate.setKeySerializer(new StringRedisSerializer());

        //从redis中获取学生总人数
        Long allStudentCount = (Long) redisTemplate.opsForValue().get("allStudentCount");

        //判断是否有值
        if (null == allStudentCount) {

            //去数据库查询
            allStudentCount = studentMapper.selectAllStudentCount();

            //将学生总人数存放到redis缓存中
            redisTemplate.opsForValue().set("allStudentCount",allStudentCount,15, TimeUnit.MINUTES);
        }

        return allStudentCount;
    }
}
9.配置023-springboot-ssm-dubbo-provider启动类
@SpringBootApplication
@EnableDubboConfiguration   //开启dubbo支持配置
@MapperScan(basePackages = "com.abc.springboot.mapper") //扫描数据持久层映射文件
public class Application {

    public static void main(String[] args) {
        SpringApplication.run(Application.class, args);
    }
}
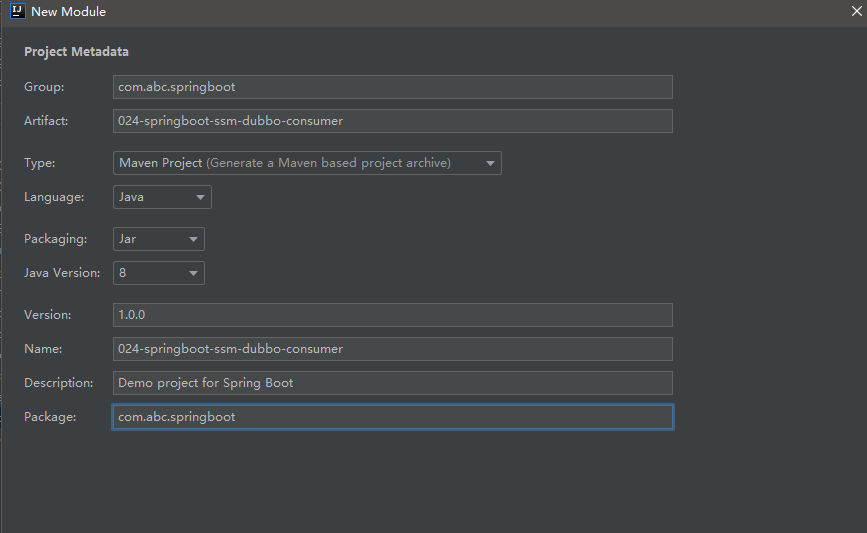
10.创建Dubbo服务消费者
项目名称:024-springboot-ssm-dubbo-consumer


11.给Dubbo服务消费者添加依赖
<!--SpringBoot集成Dubbo起步依赖-->
<dependency>
    <groupId>com.alibaba.spring.boot</groupId>
    <artifactId>dubbo-spring-boot-starter</artifactId>
    <version>2.0.0</version>
</dependency>

<!--zookeeper注册中心-->
<dependency>
    <groupId>com.101tec</groupId>
    <artifactId>zkclient</artifactId>
    <version>0.10</version>
</dependency>


<!--MyBatis集成SpringBoot框架起步依赖-->
<dependency>
    <groupId>org.mybatis.spring.boot</groupId>
    <artifactId>mybatis-spring-boot-starter</artifactId>
    <version>2.0.0</version>
</dependency>

<!--连接MySQL数据库驱动-->
<dependency>
    <groupId>mysql</groupId>
    <artifactId>mysql-connector-java</artifactId>
</dependency>

<!--SpringBoot集成Redis起步依赖-->
<dependency>
    <groupId>org.springframework.boot</groupId>
    <artifactId>spring-boot-starter-data-redis</artifactId>
</dependency>

<!--dubbo接口工程-->
<dependency>
    <groupId>com.abc.springboot</groupId>
    <artifactId>022-springboot-ssm-dubbo-exterface</artifactId>
    <version>1.0.0</version>
</dependency>
12.配置024-springboot-ssm-dubbo-consumer核心配置文件
配置内嵌Tomcat端口号
server.port=8080

#配置项目上下文根
server.servlet.context-path=024-springboot-ssm-dubbo-consumer

#配置zookeeper注册中心
spring.application.name=024-springboot-ssm-dubbo-consumer
spring.dubbo.registry=zookeeper://192.168.92.134:2181

#配置SpringMVC的视图解析器
spring.mvc.view.prefix=/
spring.mvc.view.suffix=.jsp
13.StudentController控制层
package com.abc.springboot.web;

import com.abc.springboot.model.Student;
import com.abc.springboot.service.StudentService;
import com.alibaba.dubbo.config.annotation.Reference;
import org.springframework.web.bind.annotation.RequestMapping;
import org.springframework.web.bind.annotation.RestController;

import java.util.List;

/**
 * ClassName:StudentController
 * Package:com.abc.springboot.web
 * Description:<br/>
 */
@RestController
public class StudentController {


    @Reference(interfaceName = "com.abc.springboot.service.StudentService",version = "1.0.0",check = false)
    private StudentService studentService;

    @RequestMapping(value = "/springBoot/students")
    public Object students() {

        List<Student> studentList = studentService.queryAllStudent();

        return studentList;
    }

    @RequestMapping(value = "/springBoot/student/count")
    public Object studentCount() {

        Long allStudentCount = studentService.queryAllStudentCount();

        return "学生总人数为:" + allStudentCount;
    }
}
14.配置024-springboot-ssm-dubbo-consumer启动类
@SpringBootApplication
@EnableDubboConfiguration   //开启dubbo支持配置
public class Application {

    public static void main(String[] args) {
        SpringApplication.run(Application.class, args);
    }
}
15.启动023-springboot-ssm-dubbo-provider

16.启动024-springboot-ssm-dubbo-consumer

17.启动浏览器进行测试


SpringBoot项目日志中警告信息的处理
在启动项目的时候,控制台出现如下警告信息

主要是因为Zookeeper包中,slf4j-log4j12和log4j冲突了,需要处理一下;
在服务提供者和消费中的pom.xml文件的ZooKeeper依赖中添加如下内容。
<!--zookeeper注册中心-->
<dependency>
    <groupId>com.101tec</groupId>
    <artifactId>zkclient</artifactId>
    <version>0.10</version>
    <exclusions>
        <exclusion>
            <groupId>log4j</groupId>
            <artifactId>log4j</artifactId>
        </exclusion>
        <exclusion>
            <groupId>org.slf4j</groupId>
            <artifactId>slf4j-log4j12</artifactId>
        </exclusion>
    </exclusions>
</dependency>
替换后,重启服务进行测试。