- SpringBoot集成MyBatis
- SpringBoot事务管理
- SpringBoot中SpringMVC注解
- SpringBoot实现RESTful
- SpringBoot集成Redis
- SpringBoot集成Dubbo
- SpringBoot热部署插件
- SpringBoot集成Thymeleaf
- SpringBoot Thymeleaf表达式
- SpringBoot Thymeleaf常见属性
- Thymeleaf字面量、字符串拼接及运算符
- Thymaleaf表达式基本对象与功能对象
SpringBoot使用Actuator
在生产环境中,需要实时或定期监控服务的可用性,spring-Boot的Actuator 功能提供了很多监控所需的接口。
Actuator是Spring Boot提供的对应用系统的自省和监控的集成功能,可以对应用系统进行配置查看、健康检查、相关功能统计等,一般运维人员使用多些,开发了解即可。
使用该功能步骤
我们这里监控03-springboot-web程序
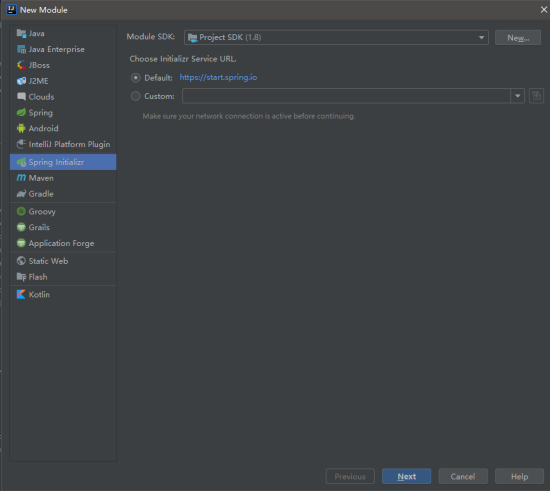
项目名称:038-springboot-actuator


1.在项目pom.xml中添加SSM需要的依赖
<!--MyBatis集成SpringBoot框架的起步依赖-->
<dependency>
    <groupId>org.mybatis.spring.boot</groupId>
    <artifactId>mybatis-spring-boot-starter</artifactId>
    <version>2.0.0</version>
</dependency>

<!--连接MySQL的驱动-->
<dependency>
    <groupId>mysql</groupId>
    <artifactId>mysql-connector-java</artifactId>
</dependency>

<!-- 加载spring boot redis包 -->
<dependency>
    <groupId>org.springframework.boot</groupId>
    <artifactId>spring-boot-starter-data-redis</artifactId>
</dependency>

<!--SpringBoot项目内嵌tomcat对jsp的解析包-->
<dependency>
    <groupId>org.apache.tomcat.embed</groupId>
    <artifactId>tomcat-embed-jasper</artifactId>
</dependency>
2.在pom文件中添加Actuator需要的依赖
<!--Spring Boot Actuator依赖-->
<dependency>
    <groupId>org.springframework.boot</groupId>
    <artifactId>spring-boot-starter-actuator</artifactId>
</dependency>
3.编写集成SSM在application.properties的配置
#设置内嵌Tomcat端口号
server.port=9090
#设置项目上下文根
server.servlet.context-path=/038-springboot-actuator

#配置jsp的前/后缀
spring.mvc.view.prefix=/
spring.mvc.view.suffix=.jsp

#配置连接MySQL数据库信息
spring.datasource.url=jdbc:mysql://192.168.92.134:3306/springboot?useUnicode=true&characterEncoding=UTF-8&useJDBCCompliantTimezoneShift=true&useLegacyDatetimeCode=false&serverTimezone=UTC
spring.datasource.driver-class-name=com.mysql.cj.jdbc.Driver
spring.datasource.username=root
spring.datasource.password=123456

#配置redis连接信息(单机模式)
spring.redis.host=192.168.92.134
spring.redis.port=6379
spring.redis.password=123456
4.在application.properties或application.yml配置文件中指定监控的HTTP端口及路径
我这里没有进行配置
o #服务运行的端口
server.port=8080
server.servlet.context-path=/038-springboot-actuator
o #actuator监控的端口(端口可配可不配,如果不配置,则使用和server.port相同的端口)
management.server.port=8100
o #actuator监控的访问上下文根路径(路径可配可不配,如果不配置,则使用和server.context-path相同的路径)
management.server.servlet.context-path=/038-springboot-actuator
5.在application.properties或application.yml配置文件中设置开启所有的端口
#默认只开启了health和info,设置为*,则包含所有的web入口端点
management.endpoints.web.exposure.include=*
6.启动MySQL
 7.启动Redis

8.启动038-springboot-actuator
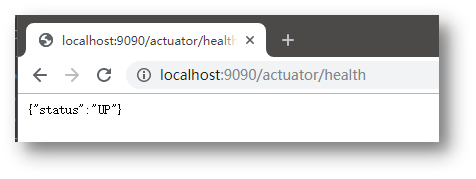
① 浏览器访问http://localhost:9090/actuator/health
② 浏览器访问http://localhost:9090/actuator/info
默认没有内容

需要自己在application.properties配置文件中添加信息,需要以info开头,后面的内容可以自己设定,一般配置项目的版权等信息,例如
#配置项目版权相关信息
info.contact.email=sxbdqn@163.com
info.contact.phone=010-84846003
配置完毕后,重启项目再进行访问

Actuator提供的主要功能
|
HTTP方法 |
路径 |
描述 |
|---|---|---|
|
GET |
/configprops |
查看配置属性,包括默认配置 |
|
GET |
/beans |
查看Spring容器目前初始化的bean及其关系列表 |
|
GET |
/env |
查看所有环境变量 |
|
GET |
/mappings |
查看所有url映射 |
|
GET |
/health |
查看应用健康指标 |
|
GET |
/info |
查看应用信息 |
|
GET |
/metrics |
查看应用基本指标 |
|
GET |
/metrics/{name} |
查看具体指标 |
|
JMX |
/shutdown |
关闭应用 |
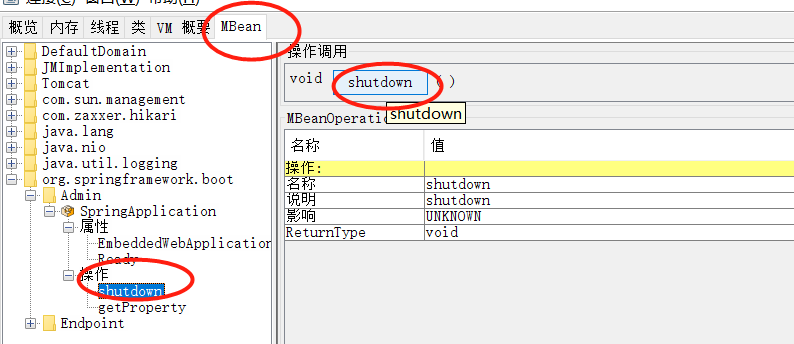
shutdown的使用
注意:/shutdown不能直接在浏览器中访问
o 先在pom.xml文件中配置
# 启用关闭springboot的服务
# 关闭SpringBoot服务是否可用,true让其关闭服务可用,默认为不可用
management.endpoint.shutdown.enabled=true
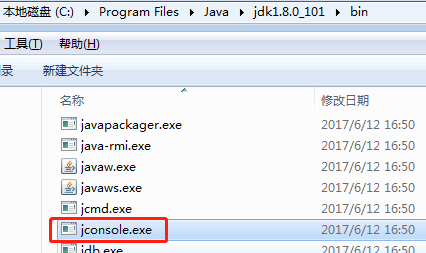
o 双击打开jconsole
o 选择Spring Boot进程,进行连接管理
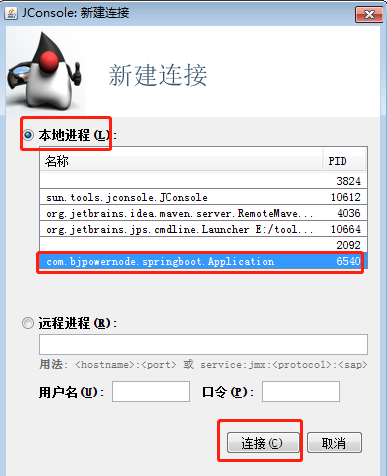
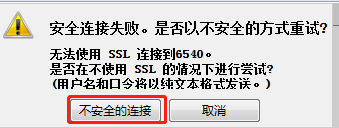
o 点击shutdown,可关闭Spring Boot服务